Wheel spacers are devices used in the automotive industry to increase the distance between the wheel and the hub assembly. They are essentially metal or aluminum discs that are fitted over the existing wheel studs or bolts before the wheel is reinstalled. The primary purpose of wheel spacers is to create additional clearance between the wheel and the vehicle’s body, suspension components, or brake calipers. Here are some key points about wheel spacers:
- Increased Track Width:
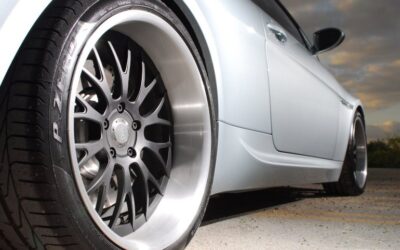
- By installing wheel spacers, the track width of the vehicle is effectively widened. This can improve the vehicle’s stability and handling by providing a broader stance. A wider track width can also enhance the aesthetics of the vehicle, giving it a more aggressive or sporty look.
- Clearance for Larger Tires:
- Wheel spacers can be used to create more space between the wheel and suspension components or fenders. This extra clearance allows for the installation of larger tires without the risk of rubbing against other parts during turns or over bumps.
- Customization and Aesthetics:
- Some car enthusiasts use wheel spacers as a customization option to achieve a specific look. Widening the track width can contribute to a more aggressive appearance, especially when paired with aftermarket wheels.
- Correcting Offset:
- In certain cases, wheel spacers can be used to correct the offset of aftermarket wheels. If the wheels have an incorrect offset, it may lead to handling issues or clearance problems. Wheel spacers can help adjust the position of the wheels for optimal performance.
- Improved Handling and Stability:
- Widening the track width can contribute to better stability and handling characteristics, especially during cornering. This is because a wider stance can enhance the vehicle’s overall balance.
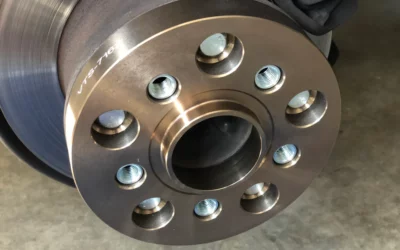
- Installation Considerations:
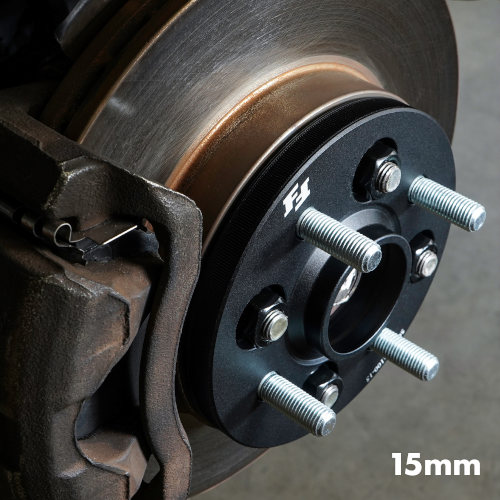
- Wheel spacers are typically installed by placing them over the existing wheel studs or bolts, and then the wheel is mounted onto the spacer. Longer wheel studs may be required in some cases to accommodate the additional thickness of the spacer.
![]()
It’s important to note that while wheel spacers can offer benefits, their use should be approached with caution. Incorrectly sized or improperly installed wheel spacers can lead to safety issues, affecting the vehicle’s handling and performance. It’s advisable to consult with a professional or adhere to manufacturer recommendations when considering the use of wheel spacers. Additionally, local regulations and laws may dictate restrictions on the use of wheel spacers, so it’s essential to be aware of and comply with these regulations.
Mounting of wheel spacer
Wheel spacers are typically mounted between the hub assembly of the vehicle and the wheel itself. Here’s a general overview of how spacers are mounted:
- Choose the Right Spacers:
- Before installation, it’s crucial to choose the correct size and type of wheel spacers for your specific vehicle and application. Spacers come in various thicknesses and designs, so it’s important to select ones that meet your needs.
- Prepare the Vehicle:
- Ensure that the vehicle is on a flat and stable surface. Engage the parking brake and use appropriate safety measures, such as wheel chocks, to prevent unintended movement.
- Remove the Wheels:
- Lift the vehicle using a jack and secure it on jack stands. Remove the lug nuts or bolts to take off the wheels. This exposes the hub assembly.
- Clean the Hub and Wheel:
- It’s advisable to clean the hub surface and the back of the wheel to ensure proper contact and prevent any debris or corrosion.
- Mount the Spacer:
- Place the wheel spacer over the existing wheel studs or bolts on the hub. The spacer should sit flush against the hub.
- Install Longer Wheel Studs (if necessary):
- In some cases, if the thickness of the spacer requires longer wheel studs for proper engagement, you may need to replace the existing studs with longer ones provided with the spacer kit. This is especially common with thicker spacers.
- Mount the Wheel:
- Position the wheel over the spacer and hub assembly. The wheel studs or bolts of the wheel should pass through the holes in the spacer.
- Tighten the Lug Nuts or Bolts:
- Thread and tighten the lug nuts or bolts onto the wheel studs. Ensure that they are tightened evenly and follow the recommended torque specifications provided by the vehicle manufacturer or spacer manufacturer.
- Check for Proper Fitment:
- After the installation, check that the wheel is seated properly against the spacer and hub. Verify that there is no wobbling or unevenness in the installation.
- Repeat for All Wheels:
- Repeat the process for each wheel on the vehicle.
- Torque Check:
- After driving a short distance, recheck the torque on the lug nuts or bolts. It’s common for them to settle after the initial installation.
It’s important to note that proper installation is crucial for the safe and effective use of wheel spacers. If you are not familiar with the installation process or if you have any doubts, it’s recommended to seek professional assistance. Additionally, always follow the guidelines provided by the wheel spacer manufacturer and adhere to any specific instructions or torque specifications for your vehicle.